Code Signing using Azure Key Vault
Code Signing certificate for code signing must be stored securely. You can also easily use the HSM in the cloud - the Azure Key Vault service. Our guide will help you create Azure Key Vault and set it up, but you'll also find a signing command that you need to put together using data from Azure, so it will help you with absolutely everything.
The Code Signing certificate must be stored securely
Code signing certificates are issued exclusively for secure means - they must be on the HSM. This can take two forms - either traditional hardware, which is expensive to acquire, or cloud-based, which fulfills the same role. Azure Key Vault, which we are going to use today, meets the FIPS 140-2 Level 2 and 3 standard, so it can be used to store Code Signing certificates. More information about the service can be found on the Azure Key Vault service page.
Setting up and setting up Azure Key Vault
There is an alternative to KeyLocker. Many customers use Azure cloud services that enable secure key storage (HSM). Thanks to Azure Key Vault, you can store your Code Signing certificate in the cloud and you don't have to deal with anything else.
To sign using a certificate in Azure, take the following steps:
- Get the certificate to the Azure key vault (create a CSR, then import the response)
- Create an application that you will call for signing
- Add the application to the Access policies of your Key Vault
- Install supporting software on your machine
Now let's go through the individual steps. They are listed here in simplified form for advanced users, but if you need a step-by-step guide, use this tutorial on GitHub. You can ignore the part about purchasing and verifying the certificate as it is done through us.
Obtaining a Code Signing certificate and setting it up in Azure
Getting a code signing certificate is easy. At SSLmarket, you can purchase a Code Signing certificate with storage on the HSM. Then create a CSR in Azure and send it to us. After issuing the certificate, we will send you the signed public key (=certificate) and you import this response into Azure.
In Azure Key Vault, go to Certificates from the left menu and click Create a certificate. In the general form, choose the name of the certificate, then Common name (be careful, it is displayed as the signer's name) and choose Certificate issued by non-integrated CA as the type of CA. Choose PEM as the format.
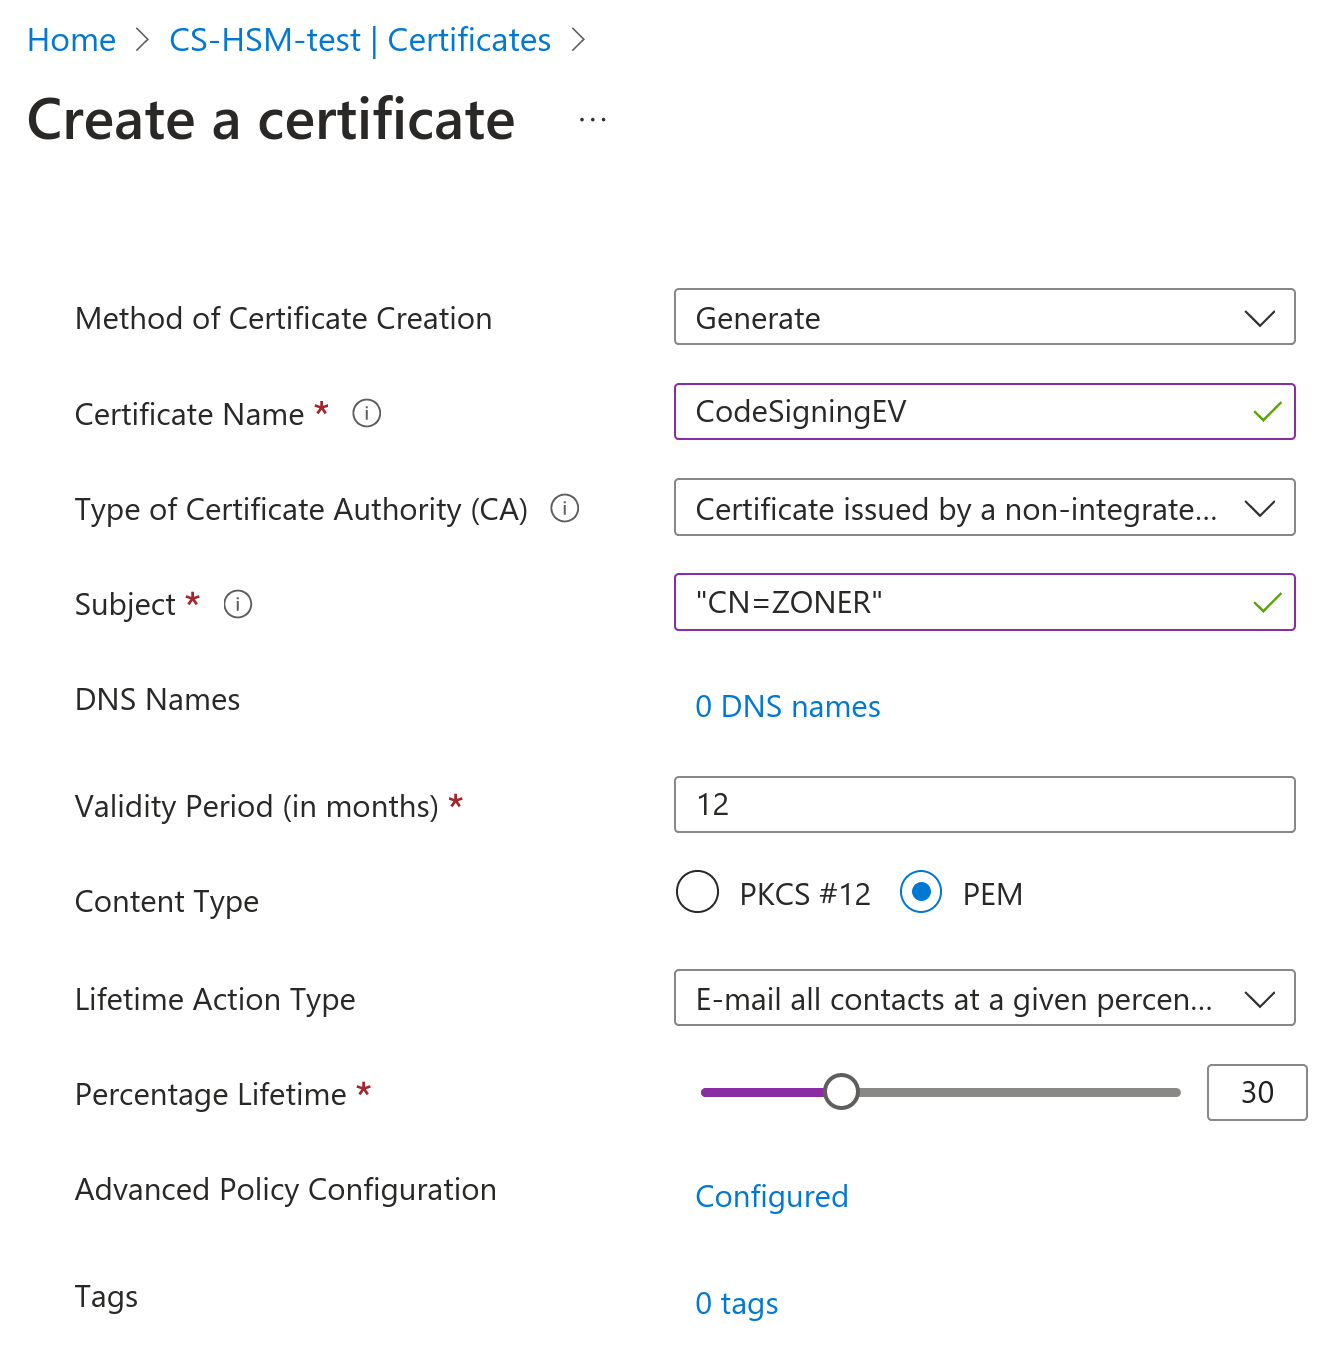
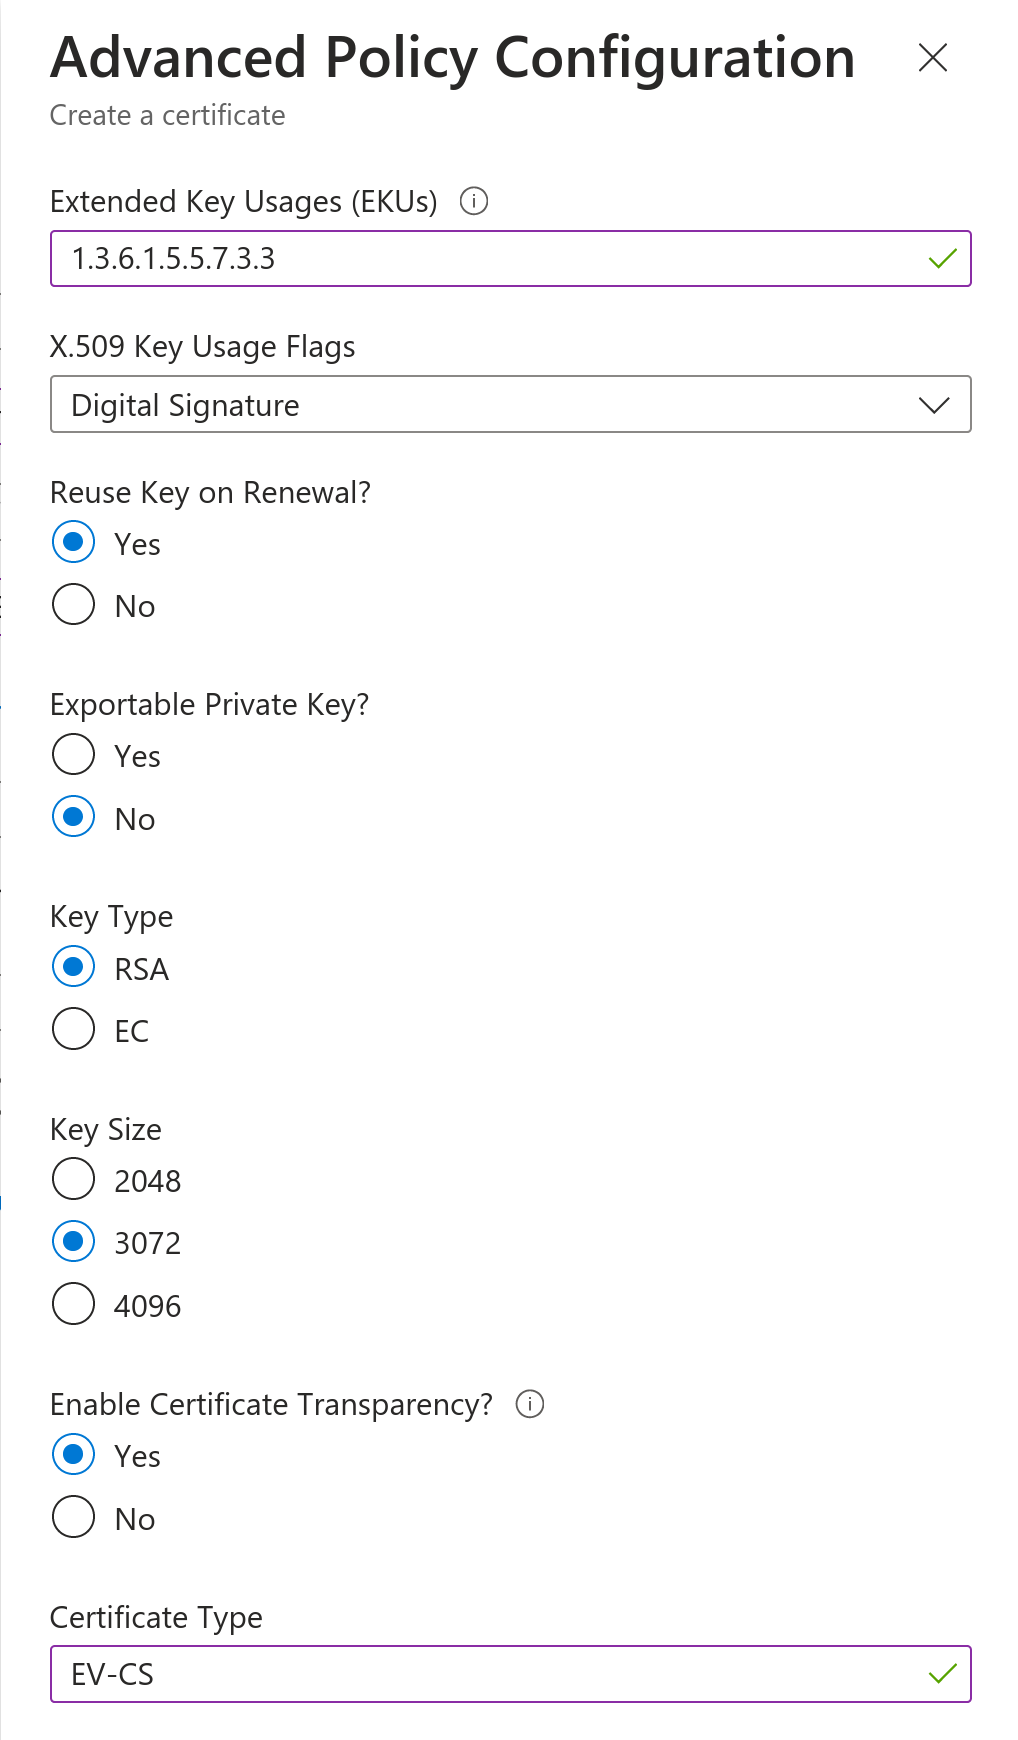
Advanced Policy Configuration must be manually configured, so click Not configured and set the following:
- Extended Key Usages (EKU) on 1.3.6.1.5.5.7.3.3
- Key Size for RSA at least 3072b, for EC at least P-256
- Private key as Not exportable if it is to be a CS EV certificate
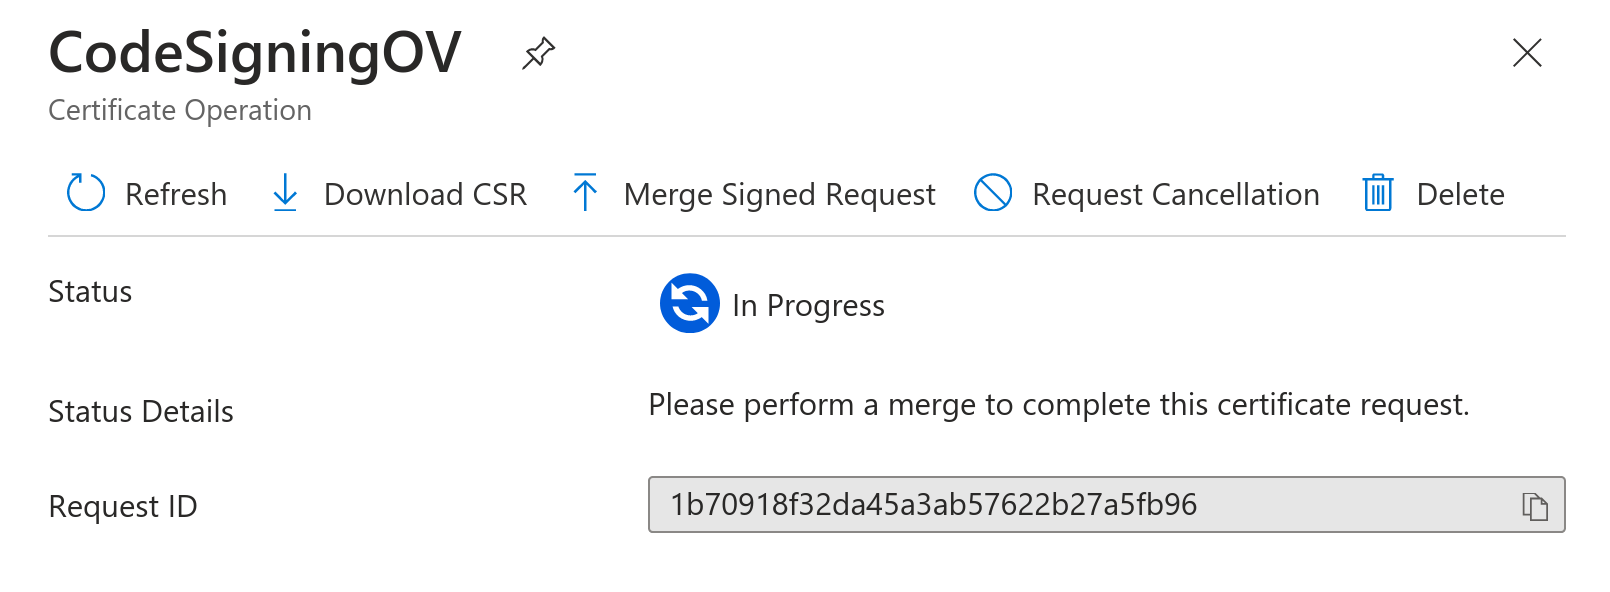
You will see a new certificate in the In progress, failed or cancelled category. Go to its detail and click on Certificate Operation, which will bring up another detail where you can download the CSR. In the same place, the issued certificate is then imported via Merge Signed Request.
You can use the downloaded CSR to order a certificate at SSLmarket, and you can use it for OV and EV Code Signing stored on HSM.
Creating an application
In addition to creating the Key Vault in the Resource Group and saving the certificate, you need to create an application in Microsoft Entra ID (formerly Azure Active Directory) and its secret; both are used for authentication and to access the Vault.
Go to the Microsoft Entra ID overview and select App registrations in the left menu - Then enter a new application registration, name it and select the access option Accounts in this organizational directory only (Default Directory only - Single tenant). After creating the application, you will see the Application ID needed to sign as a “client ID”.
Go to the Certificates & secrets. agenda in the application details in the left menu. Here, create a new Client secret and name it. Copy and save the Secret (Value) because you will not see it again.
Access policy settings
Now we have to go back to the Key Vault.
First, switch the rights model from Azure role-based access (RBAC) to Vault access policy.
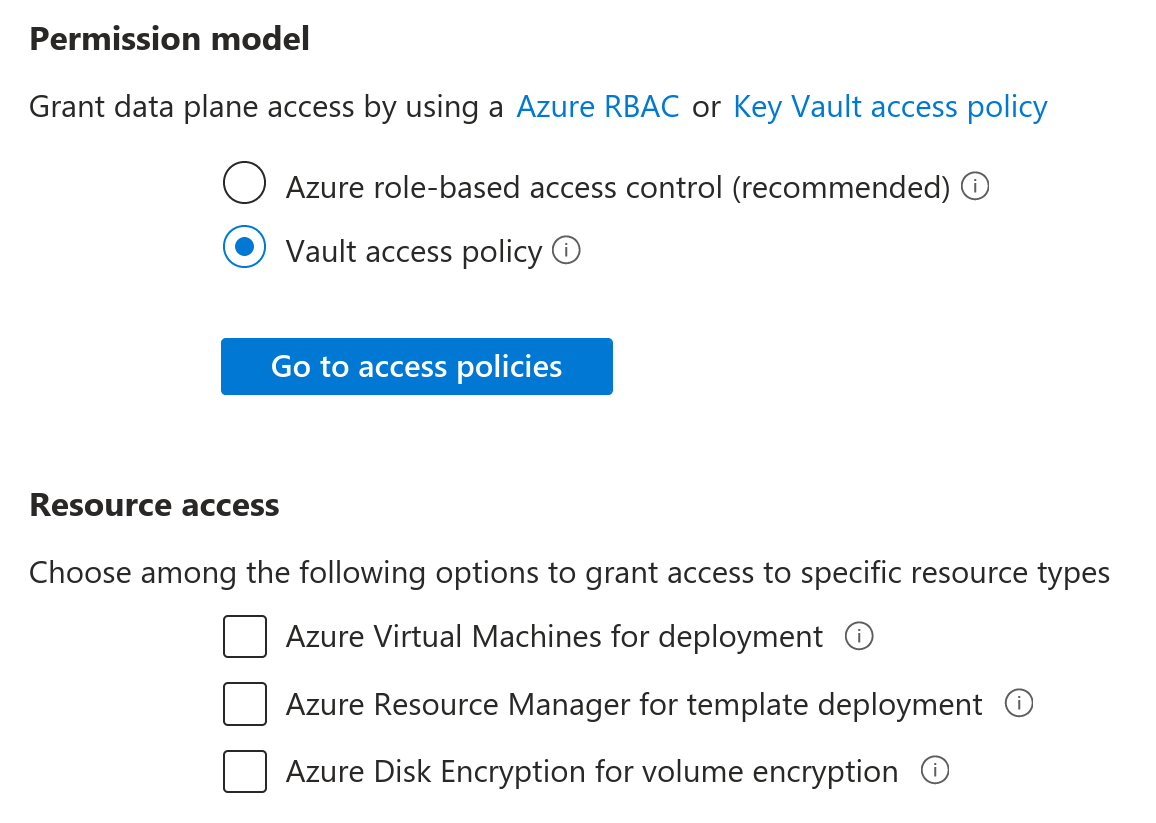
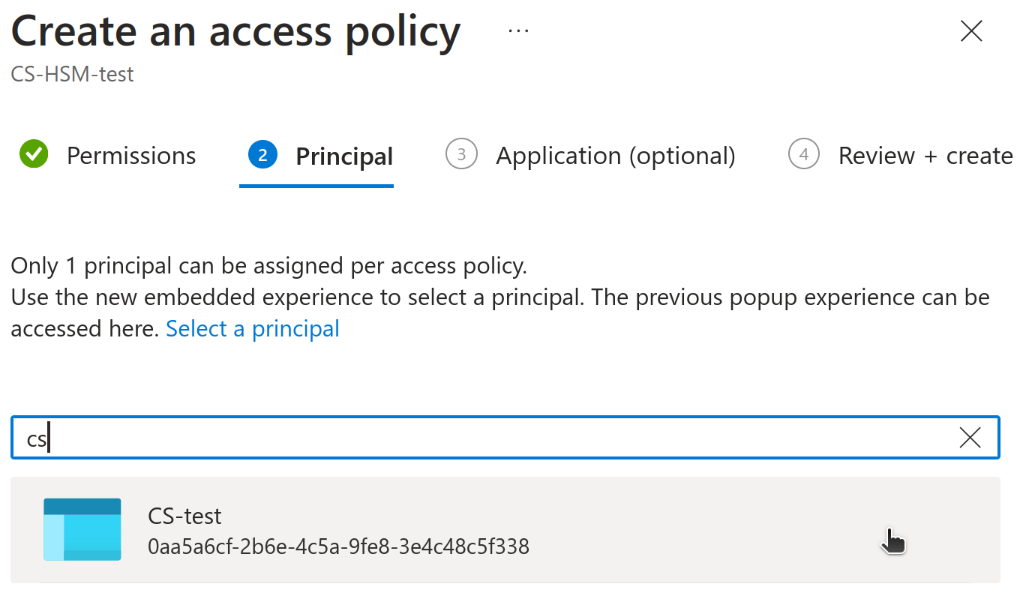
In the left menu, select Access Policies and click Create. Create an Access policy that will apply to the application you've created. At least the following permissions are required:
- Key permissions - Get, List
- Secret permissions - Get, List
- Certificate permissions - Get, List
- Cryptographic Operations - Verify, Sign
You choose the application in the second step and find it by name.
That's all you need to set up in the Azure interface.
Installing supporting software
Install the following on your computer:
- .net SDK 6.0.200, Windows x64; download
- .net ASP.NET Core Runtime 6.0.2, Windows x64; download
- Azure SignTool, you install using cmd: dotnet tool install --global AzureSignTool
Congratulations, you can now use Azure SignTool to sign code using a certificate stored in Key Vault.
Certificate signing in Azure Key Vault
Now that everything is ready to be signed, the most important thing is to have all the data we need to sign the order. It looks like this:
azuresigntool sign -kvt KEY-VAULT-DIRECTORY-ID -kvu KEY-VAULT-URI -kvi APPLICATION-CLIENT-ID -kvc CERTIFICATE-NAME -kvs CLIENT-SECRET -tr http://timestamp.digicert.com -v PATH-TO-EXECUTABLE
What is what:
- Kvt is the directory id of your Azure Key Vault
- kvu is the Azure Key Vault URL. You can find it on the main page as DNS Name.
- kvi is the application id of the Azure app you registered.
- kvc is the friendly name of the certificate you want to use. You chose this label yourself.
- kvs is the client secret, you generated for the application.
- tr is the URL timestamp server. Be sure to use a timestamp to keep the signature. trustworthy even after the certificate expires.
- v specifies the location of the file you are signing.
All of the above can be found in the Azure interface.
