Signing with KeyLocker Cloud HSM
This article will teach you how to sign using the cloud and KeyLocker HSM. The guide is relevant for all platforms and various signing tools – from signtool to jarsigner. The information provided is also the basis for signing using the Software Trust Manager from DigiCert ONE; the signing principle thus applies to both mentioned services.
KeyLocker Compatibility
Before trying out KeyLocker, you might ask yourself whether it will be possible to use it in your workflow and if it will work for you. KeyLocker and related libraries (like the Software Trust Manager in DC1) support third-party signing tools. On DigiCert's website, you will find a complete overview of file formats you can sign with compatible tools using KeyLocker in the article Signing tool integration.
Here, I will only mention the most common Signtool in 32-bit and 64-bit versions:
- SignTool (32-bit): .doc, .docm, .dot, .dotm, .msi, .cab, .exe, .dll, .mpp, .mpt, .pot, .potm, .ppa, .ppam, .pps, .ppsm, .ppt, .pptm, .pub, .vdw*, .vdx*, .vsd*, .vsdm, .vss*, .vssm, .vst*, .vstm, .vsx*, .vtx*, .wiz*, .xla, .xlam, .xls, .xlsb, .xlsm, .xlt, .xltm
- SignTool (64-bit): .appx, .appxbundle, .arx, .cab, .cat, .cbx, .cpl, .crx, .dbx, .deploy, .dll, .drx, .efi, .exe, .js, .msi, .msix, .msixbundle, .msm, .msp, .ocx, .psi, .psm1, .stl, .sys, .vbs, .vsix, .wsf, .xsn
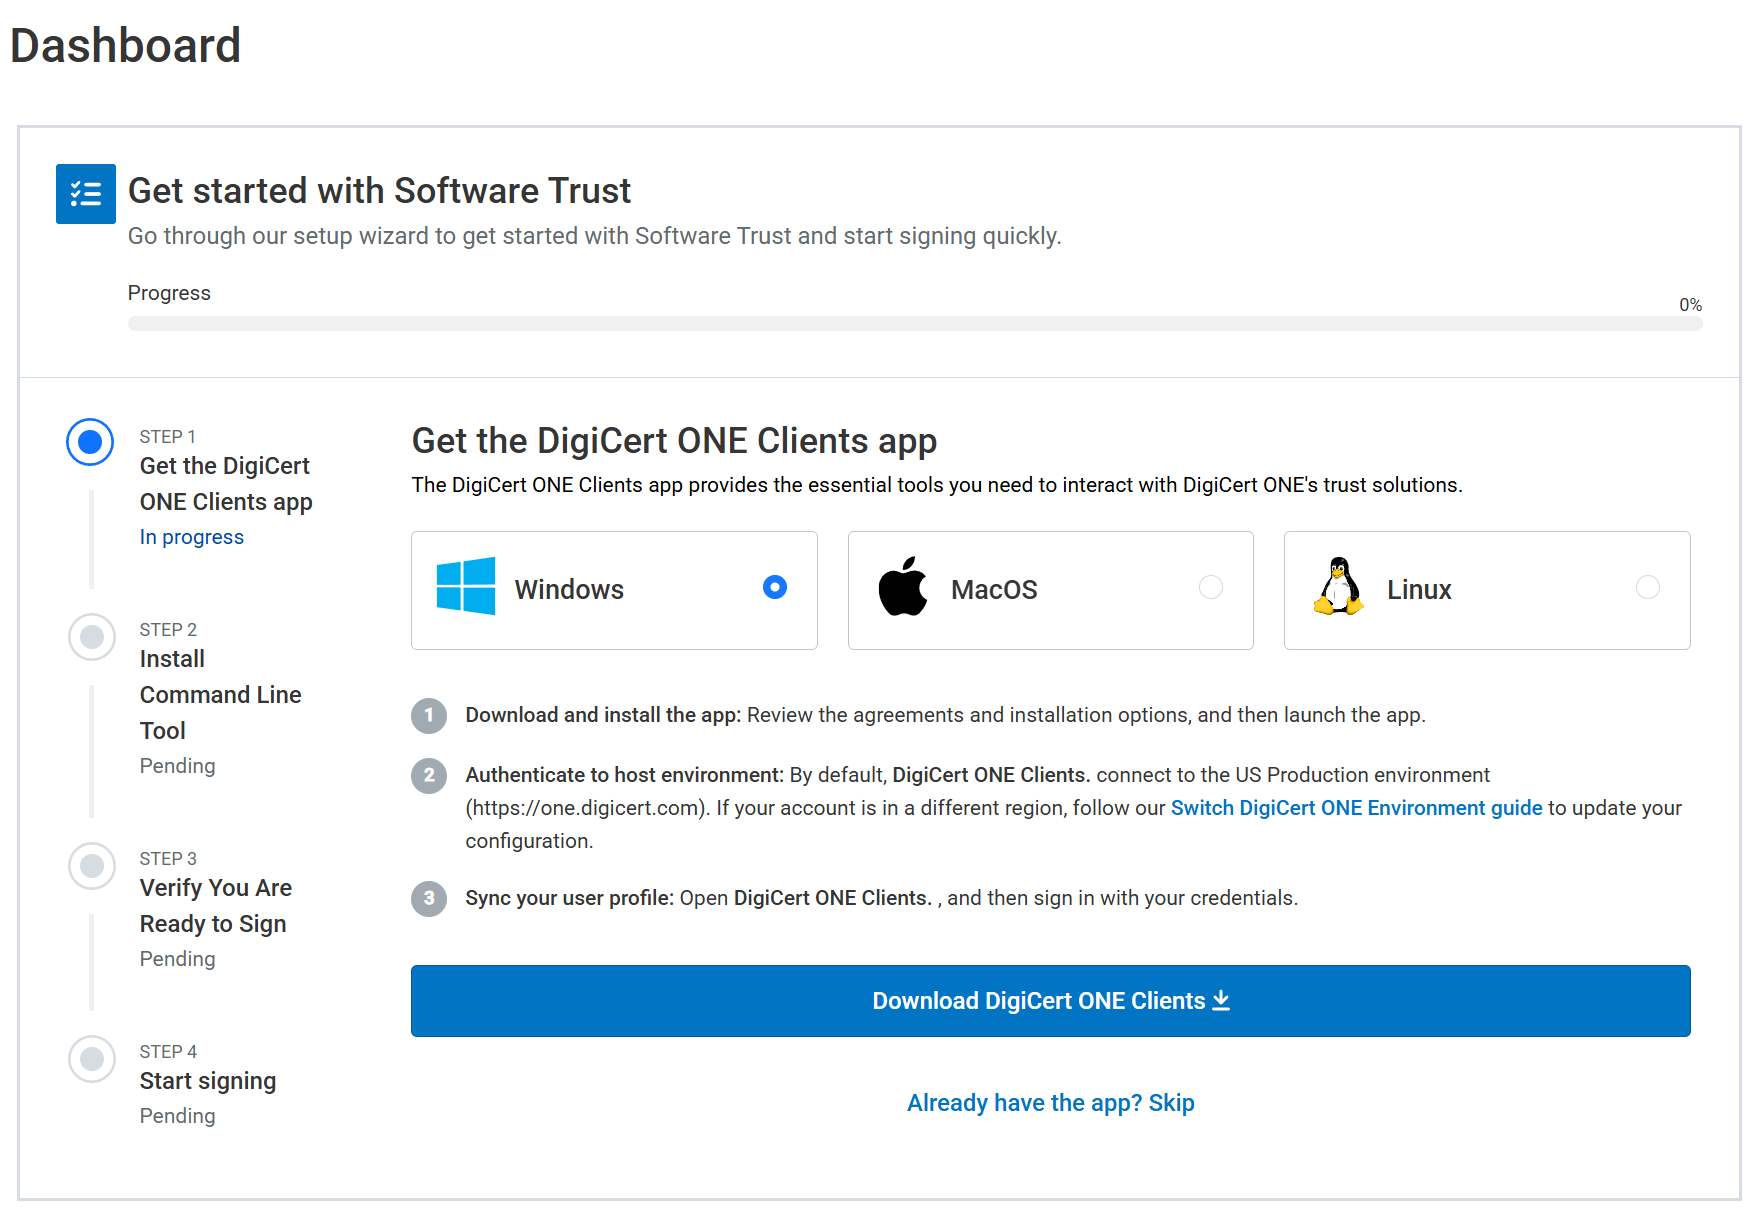
Guide in KeyLocker
After logging into KeyLocker, you will see the Setup Guide, which will help you download the DigiCert ONE Clients app. With it, you will log in on the computer to the KeyLocker account, install the necessary libraries including SMCTL, and set up authentication variables in the system. Compared to previous procedures, this is a significant simplification.
In the first step of the KeyLocker guide, download the DigiCert ONE Clients app, install and run it. The login is the same as you have set up for the KeyLocker web interface.
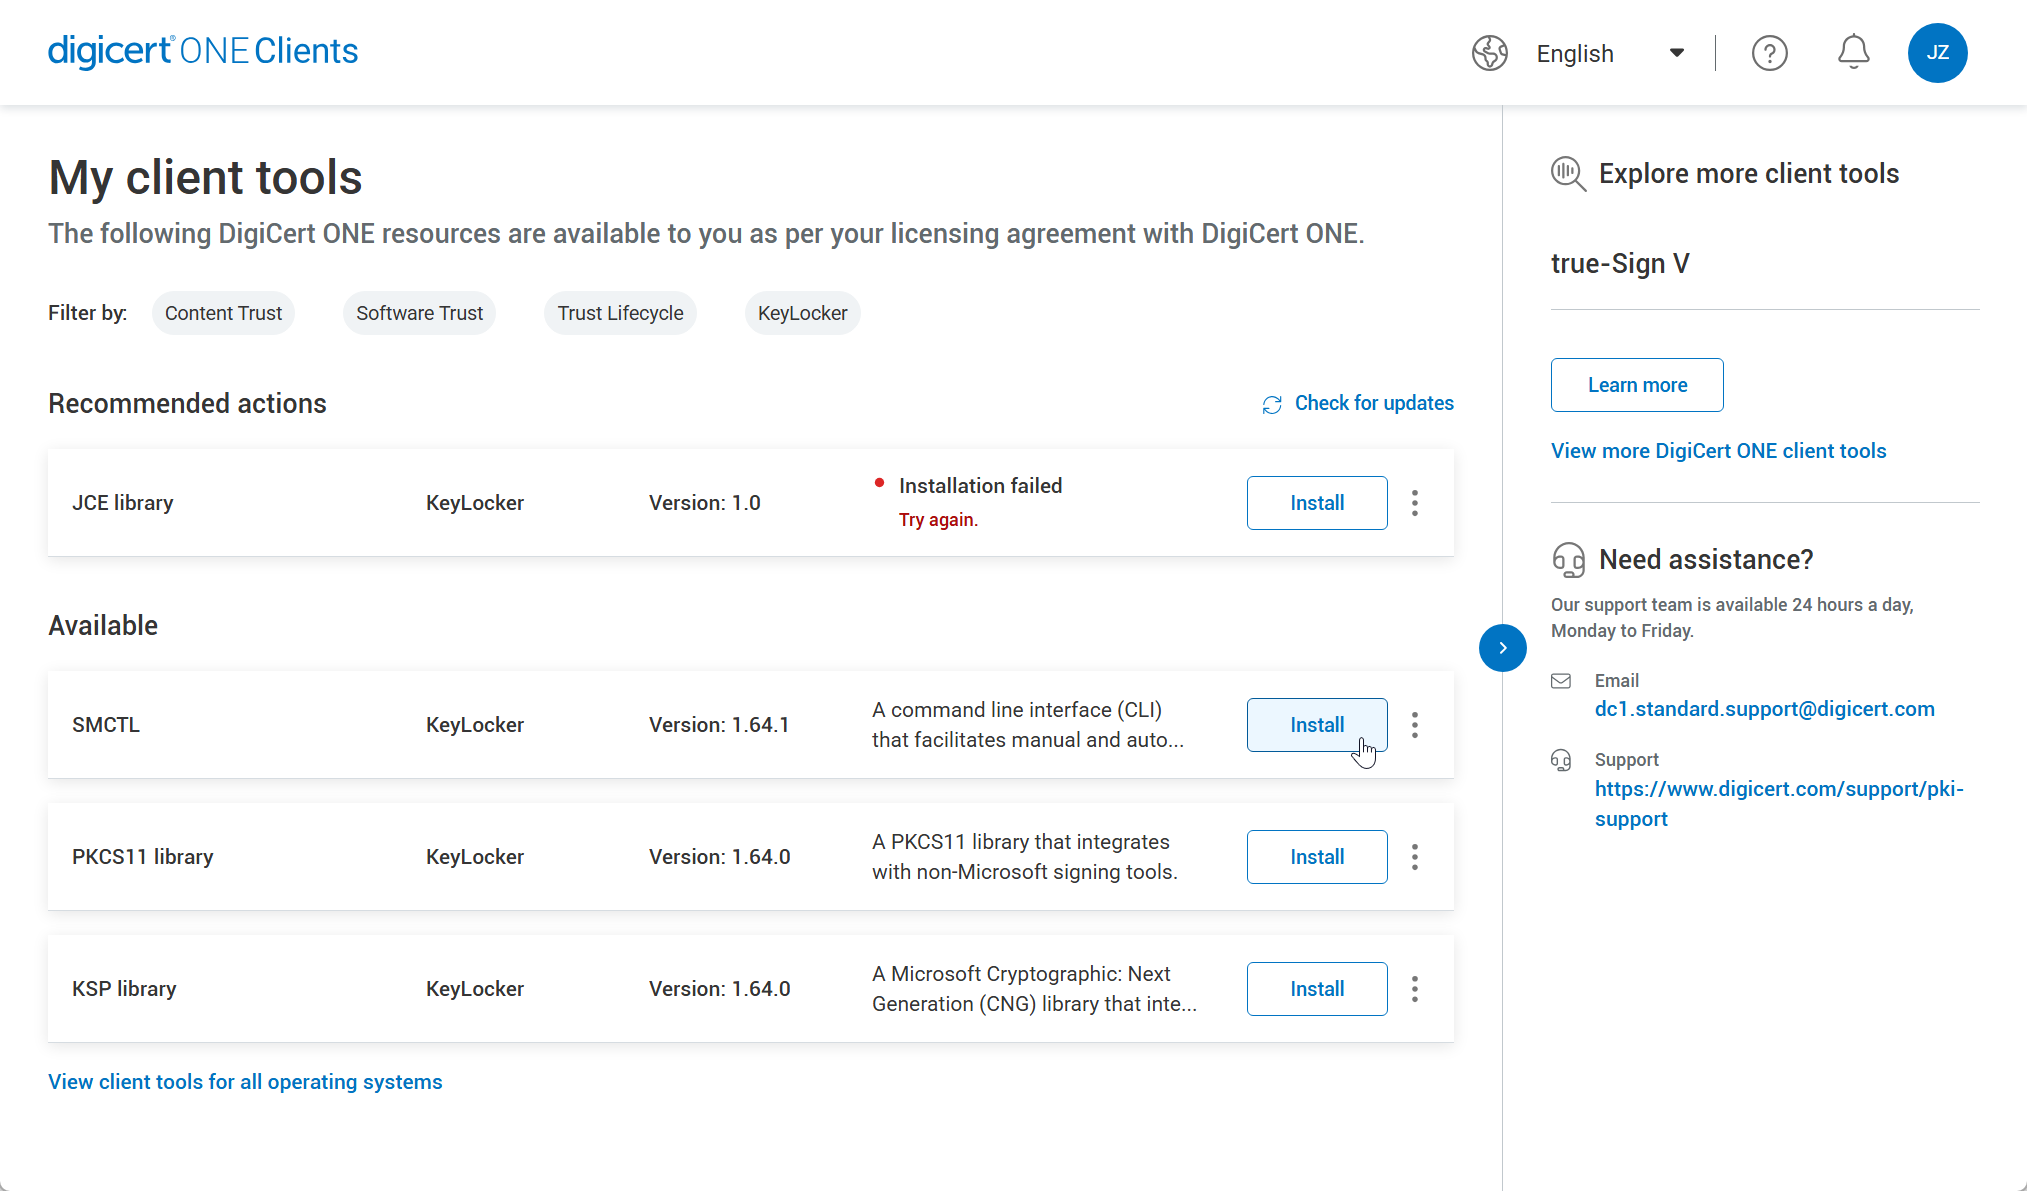
In the next step in the desktop app, install SMCTL, which is the main tool for actual signing.
After installation, you will see a selection of three possible ways to store the KeyLocker variable in the system. We recommend keeping the default option "Store my credentials". The data will be saved to the system and you won't need to log in to the account again before each signing.
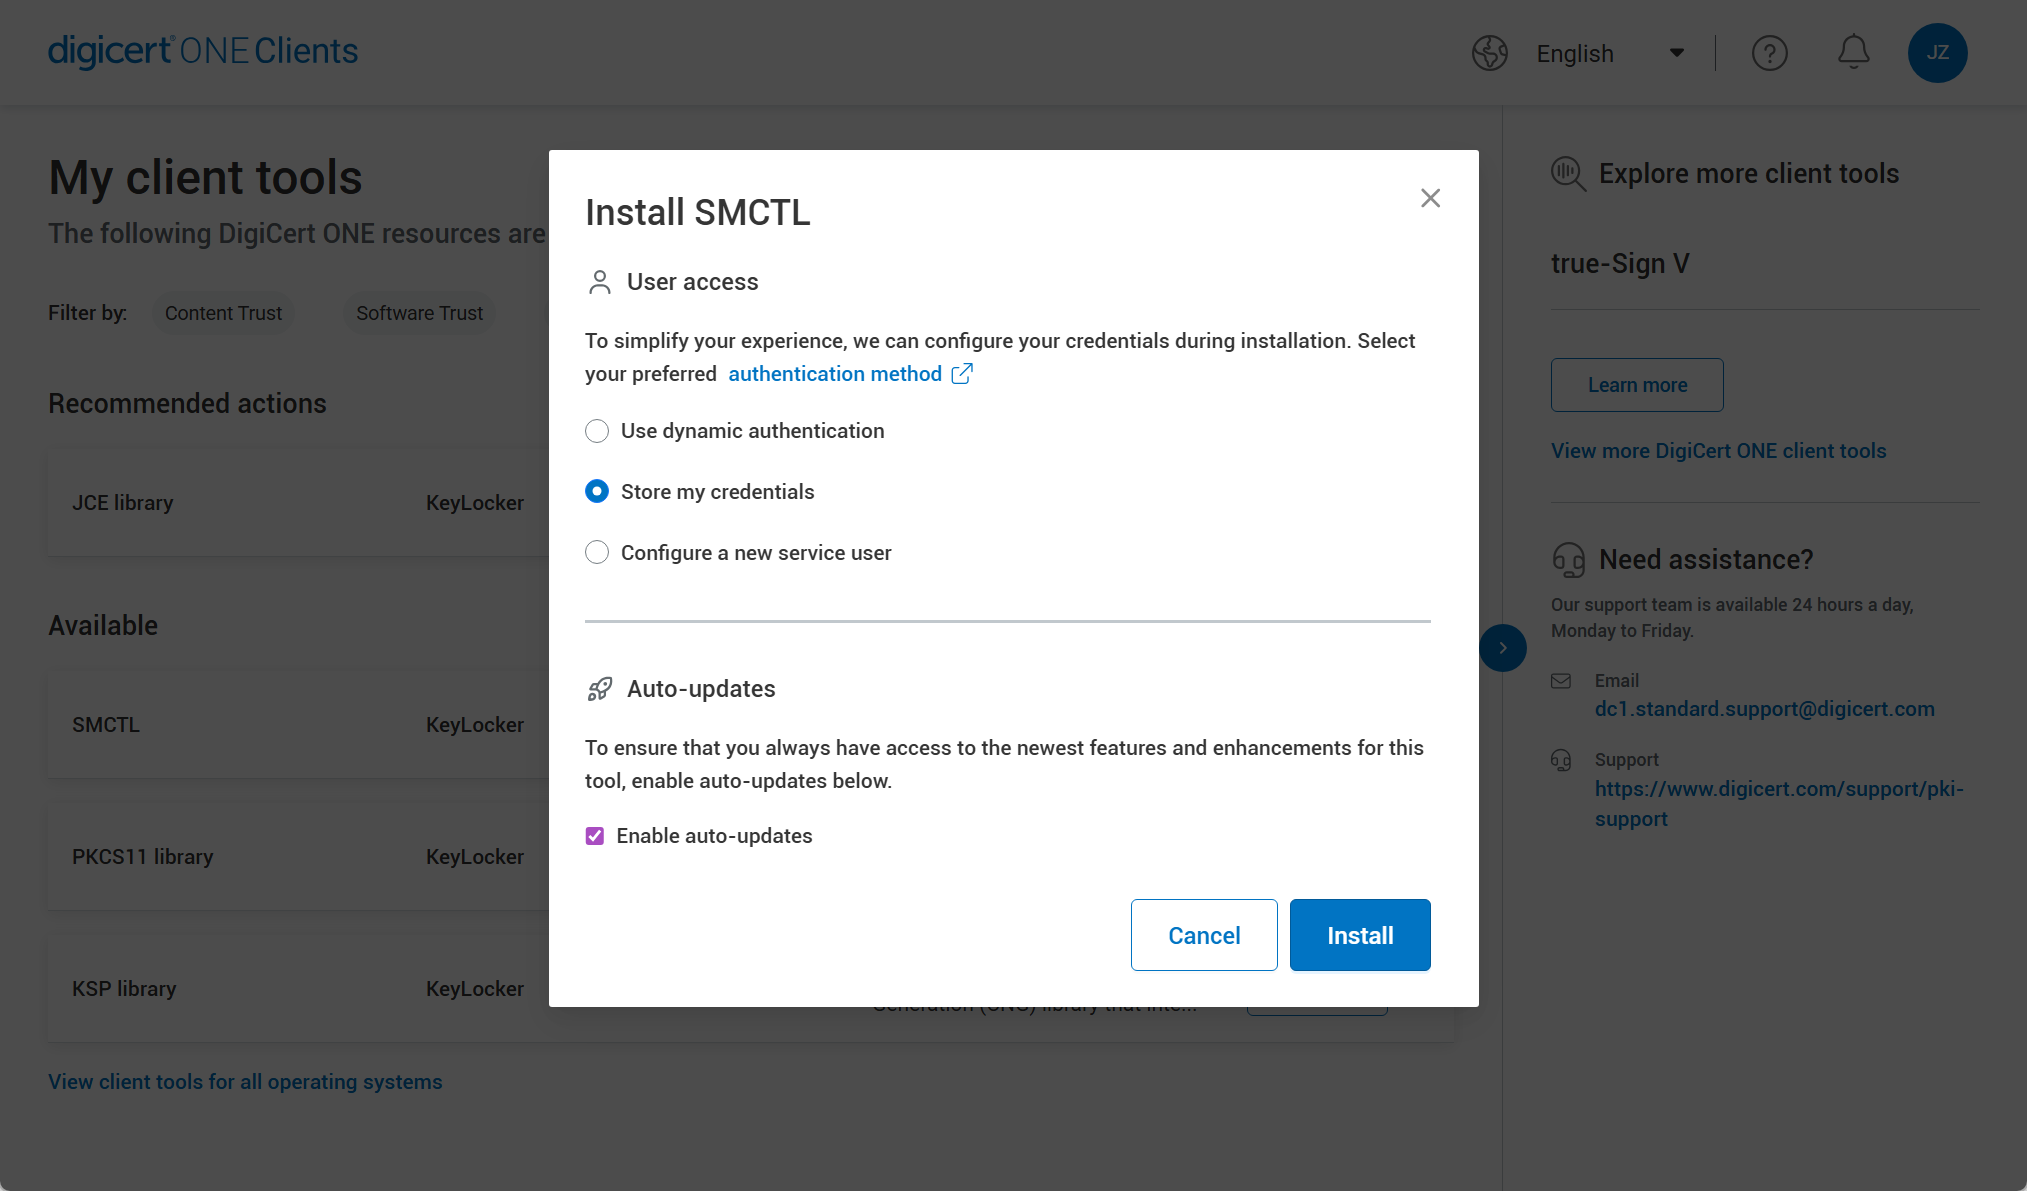
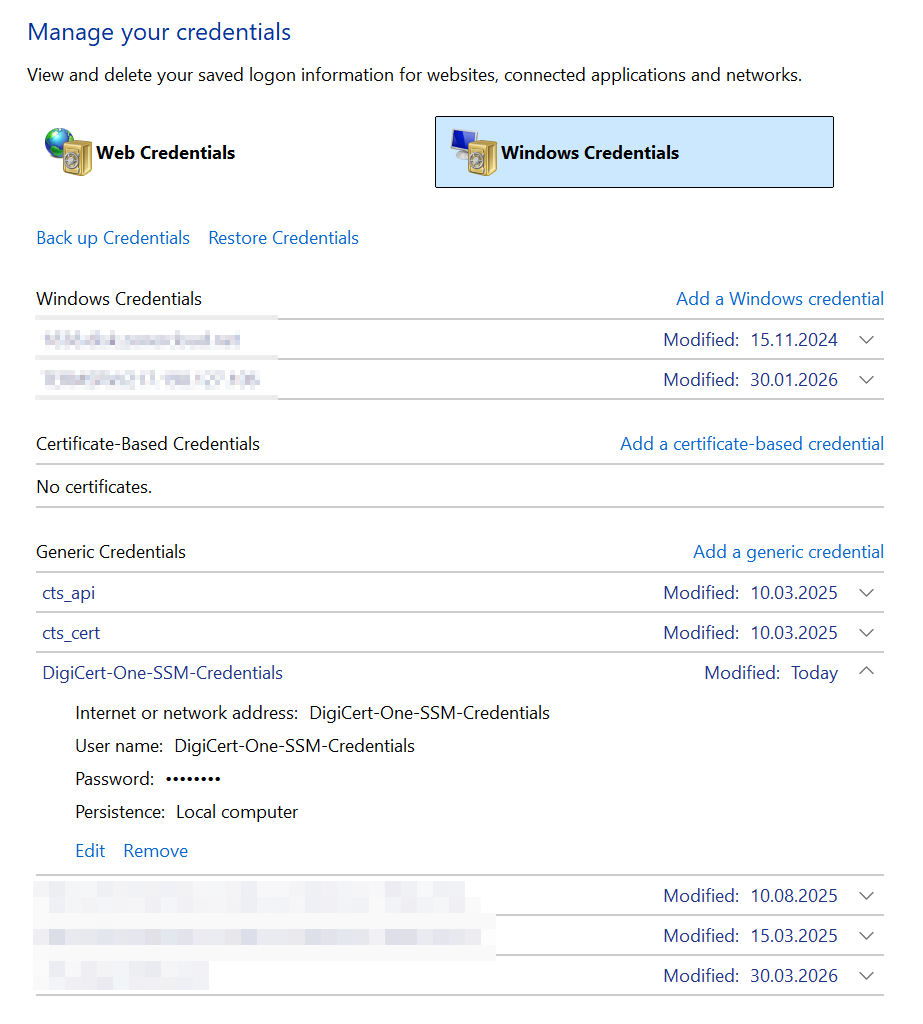
If you choose the option to store in the system, the credentials will be in the Credential Manager on Windows.
After setting up system credentials, which is automatically done by the DigiCert ONE Clients app, proceed to the third step of the guide. At this point, it will ask you to run the SMCTL healthcheck command in your system, which will test local environment communication with KeyLocker and proper authentication. Everything should go smoothly, so confirm "I have run the healthcheck command in SMCTL" and click the Check Status button.
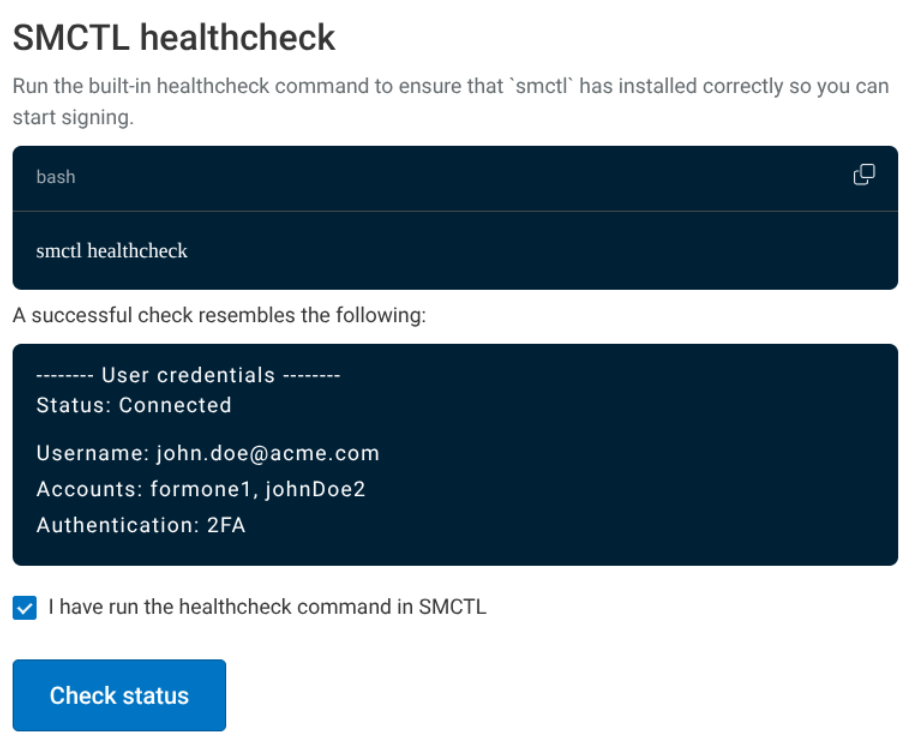
You will see a green confirmation You're ready to start signing with SMCTL, which means everything is set up correctly, communication works, and you can begin signing.
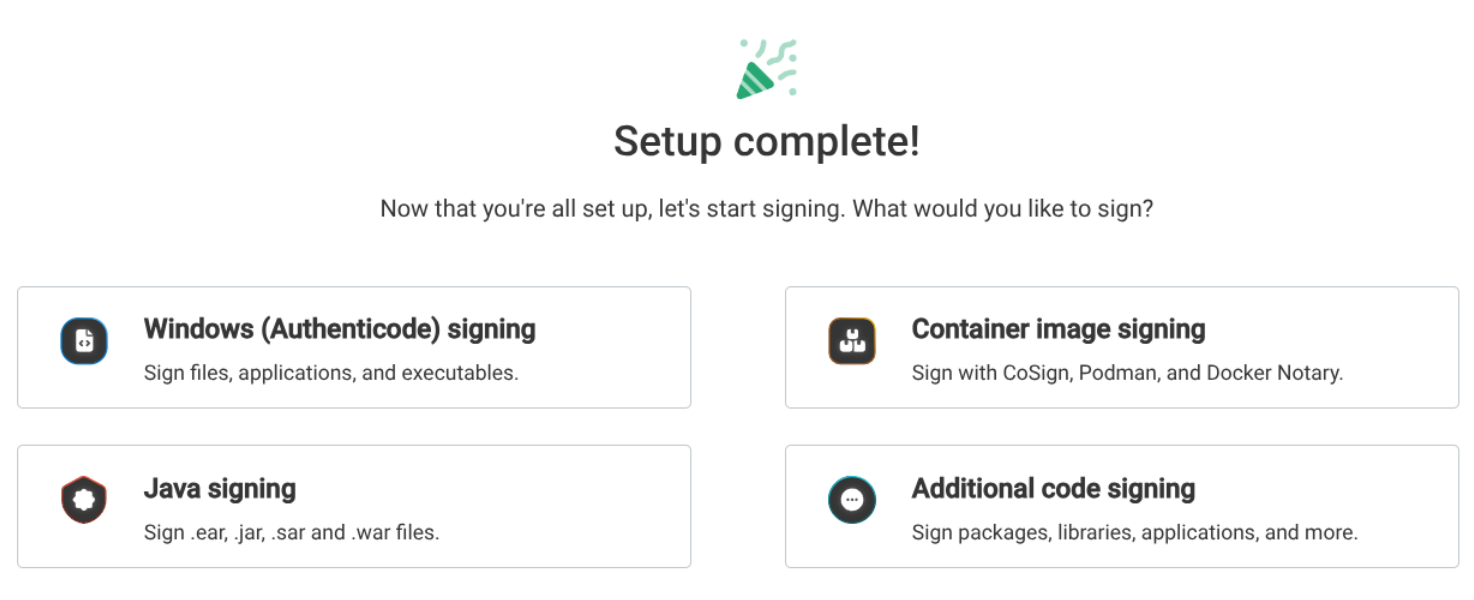
Choose the appropriate platform you are using for signing from four options, and you will then see an example (guide) for signing using KeyLocker.
Signing Files
For signing, we primarily recommend using the SMCTL utility, which operates in the command line (CLI). The other option is the DigiCert® Click-to-sign utility (see the last paragraph).
Guides for signing files for main platforms (Authenticode, Docker, Java...) can be found directly in the KeyLocker web interface. After completing the guide (heading "Setup complete!"), you can click on one of the offered platforms and the interface will display a ready command using the selected certificate. Just copy it to the CLI and specify the file to be signed. It couldn't be easier!
Signing Files Using SMCTL (recommended)
The SMCTL utility comes from DigiCert and can also serve for simplified signing of files using third-party tools (you still need at least signtool). SMCTL works with the most widely used tools – Signtool, Apksigner, Jarsigner, Mage, Nuget. You can find the tool in the folder C:/Program Files/DigiCert/DigiCert Keylocker Tools/smctl.exe
In the last step of the guide, click on Authenticode, and in the next dialog, choose the certificate available in KeyLocker. You will receive a complete command for signing, where you add the target and run locally in your CLI. You will immediately receive confirmation of successful file signing.
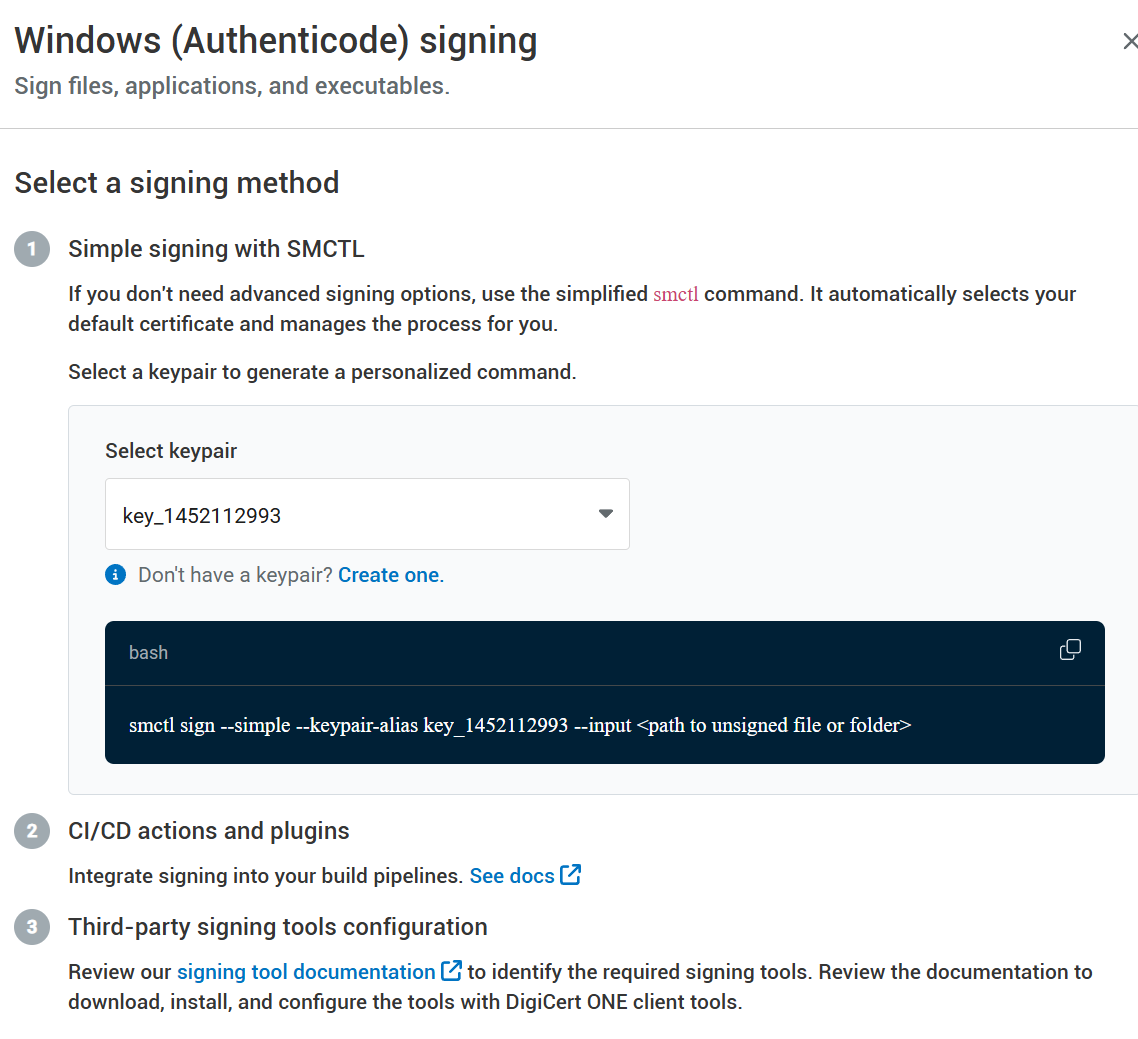
Complete SMCTL documentation can be found on the DigiCert website.
Signing Files with Signtool
The following guide concerns the Signtool tool from the Windows SDK package. It is the most widely used tool for signing on the Windows platform.
The Signtool command needs to specify which file you want to sign, which certificate to use, and possibly related parameters. You can refer to the signing certificate in several ways: You can let Signtool choose the certificate automatically based on the store, or you can specifically choose the certificate by referencing a file with the saved certificate (of course, only the public part without the private key), or you can use the SHA-1 hash of the certificate.
Here is an example of signing using the certificate fingerprint hash:
C:/>signtool.exe sign /sha1 ecb0f10ab1XXXXXXXXXX1681fb70a31e32288263 /tr http://timestamp.digicert.com /td SHA256 /fd SHA256 C:/Users/User/Documents/HelloSign.exe
And here is an example of signing using KeyLocker and a certificate file:
 C:/Users/User>signtool.exe sign /csp "DigiCert Signing Manager KSP" /kc key_558469087 /f C:/Users/User/Documents/cert_558469087.crt /tr http://timestamp.digicert.com /td SHA256 /fd SHA256 C:/Users/User/Documents/HelloSign.exe

Done Adding Additional Store

Successfully signed: C:/Users/User/Documents/HelloSign.exe
You can verify the validity of the signature with the command: signtool verify /v file.exe Signature properties can also be found in the signed file through Explorer and Properties (right-click).
Signing Files Using Jarsigner
You can use Jarsigner along with KeyLocker thanks to the PKCS11 library; you can sign easily using SMCTL, or directly using Jarsigner and the PKCS11 library.
Example of signing using Jarsigner:
jarsigner -keystore NONE -storepass NONE -storetype PKCS11 -sigalg SHA256withRSA -providerClass sun.security.pkcs11.SunPKCS11 -providerArg pkcs11properties2.cfg -signedjar C:/Users/Name/Desktop/signed/signedjar.jar C:/Users/Name/Desktop/ToSign/jartosign.jar key3 -tsa "http://timestamp.digicert.com"
You can verify the correctness of the signature with the command:
jarsigner -verify
Jarsigner documentation can be found on the DigiCert website.
Signing Using DigiCert® Click-to-sign
This utility offers a graphical interface to facilitate file signing. The result and principle of signing, however, do not differ from command line tools; in contrast, they allow for more detailed signing parameter settings. DigiCert® Click-to-sign offers only simplified options, which might suffice for most users.
DigiCert® Click-to-sign has one significant advantage – to set it up, you need to go through the setup guide for KeyLocker access credentials (Secrets). The guide will not only test the connection with the cloud but mainly set these variables into the system! You won't have to set them manually in a complicated manner.
Signing with this tool is straightforward – right-click on the file to sign and select Click to Sign from the menu. Then you can sign directly or with a signature setting confirmation.

Documentation for Click-to-sign can be found on the DigiCert website.
Note: If Click-to-sign does not work for you, set the PATH variable to include paths to both the Click-to-sign and signing application (Signtool), separated by a semicolon. For example:
Path: C:/Program Files/DigiCert/DigiCert Keylocker Tools;C:/Program Files (x86)/Windows Kits/10/bin/10.0.22621.0x64;
Integration into CI/CD
The main advantage of KeyLocker is the ability to automate signatures through integration into CI/CD workflows. DigiCert has prepared a number of scripts and plugins for the most popular development tools and platforms. Plugins are available for Azure DevOps, GitHub, and Jenkins. There are even more integration scripts for the PKCS11 library.
Complete information can be found in the article CI/CD integrations.
Documentation and Other Resources:
- Documentation for SignTool, available at https://learn.microsoft.com/cs-cz/dotnet/framework/tools/signtool-exe
- Documentation for KeyLocker, available at https://docs.digicert.com/en/digicert-keylocker.html
